APAP Self-Checks to Fix Common Setup Problems
An APAP device, or auto-adjusting positive airway pressure machine, is used in the management of sleep apnea by delivering pressurized air through a mask to keep the upper airway open. Unlike single-pressure CPAP machines, it automatically adjusts air pressure levels to your individual breathing requirements for comfortable, uninterrupted sleep.
The first time you set up your ResMed AirSense Autoset or similar APAP machine, there are potential APAP device setup problems or APAP setup errors which you should be aware of. Common challenges include mask leaks, uncomfortable pressure settings, or machine malfunctions. However, by following simple APAP self-check steps and using built-in diagnostics, you can resolve most APAP therapy problems at home. This ensures smooth treatment and improved sleep quality.
This guide covers an APAP setup checklist, APAP machine self-test routines, and solutions for common issues like mask leaks and airflow problems. You’ll gain the knowledge to maintain effective therapy and address APAP device comfort issues proactively.
Understanding Your APAP Device
Your APAP machine, such as the ResMed AirSense Autoset or AirSense 11 AutoSet, is designed to deliver effective positive airway pressure (PAP) therapy. Each component plays a vital role in ensuring optimal functionality which are explained below.
The main unit features the Easy-Breathe motor for quiet operation and the AutoSet algorithm, which adjusts pressure levels breath-by-breath based on your breathing patterns. This algorithm also helps distinguish between obstructive sleep apnea (OSA) and central sleep apnea (CSA).
The integrated HumidAir humidifier adds moisture to prevent dryness, which can be controlled manually or through Climate Control auto settings.
The mask, which may be a full face mask, nasal mask, or nasal pillow mask, creates a seal over your airway and is connected to the machine via tubing that delivers the air pressure.
Air filters, available in standard or hypoallergenic options, keep dust and particles out of the machine.
Features like SmartStart initiate therapy as soon as you breathe in, and AutoRamp detects sleep onset to gently increase pressure. These features enhance your therapy experience.
The touchscreen display or color LCD makes navigating settings simple.
EPR (Expiratory Pressure Relief) reduces pressure during exhalation for added comfort. EPR levels can be customized to suit your preferences.
Bluetooth connectivity allows your device to sync with apps like myAir, providing data tracking, performance insights, and enabling remote adjustments.
Basic Setup Checklist
To set up your APAP machine you need to begin by placing your APAP machine on a stable, flat surface near an outlet with good ventilation, such as a bedside table. You should avoid placing it on carpet to prevent the machine from sucking in dust, dirt and carpet fibers.
You will then need to connect the 65W power supply, attach the tubing to the back air outlet and your mask, and fill the humidifier with distilled water if you are using it. Install fresh air filters and use the MaskFit function to check for leaks in your mask. You can do this by listening for hissing sounds or feel for escaping air.
Turn the machine on by using the Start/Stop button. SmartStart is able to automatically activate the machine.
Adjust settings in My Options, such as Ramp Time (Auto, 5-45 minutes, or off), humidity level, and EPR for comfort. Perform a quick APAP device performance check by looking for any errors on the screen, ensuring steady airflow, and verifying the ambient light sensor dims correctly.
With these steps completed, you’re ready for seamless CPAP therapy!
Common Issues and How to Fix Them
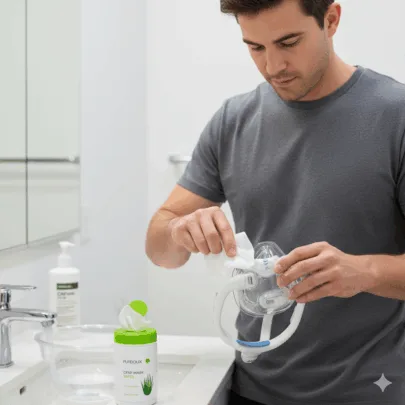
Picture this: you’re drifting off, but a persistent hiss wakes you—or your partner—up, signaling an APAP mask leak self-check is in order. Air leaks often stem from a poor mask fit. Lie down before adjusting the straps to ensure a natural seal, and clean the cushion weekly with mild soap to remove oils that can break the seal. Run the built-in Mask Fit test to pinpoint gaps, or use tissue paper to detect escaping air around the edges.
Inspect connections thoroughly. Ensure the tubing clicks firmly into the ResMed AirSense outlet and mask. Check the humidifier tub gasket for proper seating by removing, realigning, and pushing it in fully on a level surface. If hoses show wear from nightly tossing, replace them promptly, as they are prone to leaks.
If issues persist, consider switching mask types—for instance, moving from a full-face mask to a nasal pillow mask—after consulting your provider.
Optimizing Humidity and Temperature Settings
Experiencing dry mouth or water build-up in your tubing? These are often caused by condensation, also known as rainout. To fix this, match the tube temperature to the room air. Increase bedroom warmth or tuck the hose under your blanket to use body heat. For modern APAP machines with heated tubing, like ClimateLineAir, adjust the heated tube setting in My Options to prevent rainout.
Set the HumidAir level between 1-8 (or use the auto setting) to combat dryness without overflow. Be sure to empty excess water daily and use distilled water only. If spills occur, dry the chamber thoroughly before refilling it over a sink to avoid machine glitches. These simple adjustments help ensure your APAP airflow remains trouble-free and your airways stay comfortable.
Ensuring Proper Air Pressure
Feeling like the pressure levels are too high or too low? Your auto-adjusting CPAP should manage this via the AutoSet algorithm. However, verify there are no clogs by swapping air filters monthly, as dirty filters can increase noise and alter pressure delivery.
Use the APAP pressure issues self-check on the app or screen to compare average pressures against your prescribed range. Additionally, checking for APAP airflow troubleshooting and resolving leaks can help maintain consistency in therapy.
And, it’s recommended to replace the disposable filter every two weeks.
Enable Ramp or AutoRamp settings for a gradual pressure buildup, and adjust EPR settings for easier exhales if the pressure feels too intense. High air leaks can trick the machine into over-pressurizing, so address those first. If pressure issues persist, consult your doctor about prescription adjustments instead of making manual changes. Maintaining a steady airflow ensures better control over obstructive sleep apnea.
Advanced Troubleshooting Techniques
If your APAP device encounters issues such as unresponsive SmartStart/SmartStop features or erratic behavior during therapy, performing a reset can often resolve the problem. For minor glitches, try a soft reset by holding the power button for a few seconds to restart the device. This action resolves many system errors without losing any stored data.
If APAP setup errors persist, such as a frozen screen or malfunctioning features despite initial checks, perform a hard reset. Unplug the unit, wait for 5 minutes to allow the software to reset, then plug it back in and test the airflow.
Persistent APAP therapy troubleshooting may also involve addressing advanced issues like SmartStart glitches or unusual noises. Always note any error codes and share them with your provider for further assistance. However, avoid frequent resets, as they cannot resolve hardware problems such as motor failures.
Software Updates and Device Maintenance
Keep your ResMed AirSense device updated with the latest software by using the myAir app or wireless connectivity. These updates fix bugs and improve the precision of the AutoSet algorithm. Check for updates monthly in the settings menu. For advanced diagnostics, access the Clinical Menu by holding down the “My Options” and “My Sleep View” buttons for 3 seconds. This enables the Advanced Patient View, providing detailed therapy data for more in-depth self-diagnostics.
For routine maintenance, wipe the exterior of the device weekly, replace air filters every 1-2 months to prevent clogs, and inspect the tubing for cracks quarterly. Use insights from the myAir app to adjust your APAP user self-diagnostics and troubleshooting approach as needed. If you experience delays with SmartStart, verify that the mask type settings are correct—such as selecting “Nasal Pillow” for an AirFit F40 mask—and ensure the feature is enabled in the menu.
And, don’t forget to replace the disposable filter every two weeks.
Following these steps can enhance the reliability of your sleep apnea therapy over the long term.
Maintaining and Enhancing APAP Therapy Over Time
Sticking with your APAP therapy long-term is not just about resolving occasional issues—it’s about creating habits that seamlessly integrate it into your daily life. This approach improves sleep apnea treatment outcomes and ensures your APAP machine continues to function effectively for years.
Commit to daily maintenance by emptying the humidifier chamber each morning, rinsing it with distilled water, and allowing it to air-dry. This prevents bacteria buildup that can worsen nasal issues or reduce the therapy’s effectiveness.
On a weekly basis, clean masks, straps, and tubing using mild soapy water or a vinegar solution (in a 1:9 ratio). Hang these items to dry completely, and avoid harsh cleaners that can degrade seals.
Utilize mobile apps to track your usage data, join online CPAP support groups for encouragement, and schedule regular follow-ups with your sleep specialist. Research shows that these steps can increase adherence to therapy by up to 30%. Maintain consistency by going to bed at the same time every night, even on weekends, and optimize your sleeping environment by keeping your room cool, dark, and quiet to align with your body’s natural rhythm.
Replace disposable filters every 2 weeks to protect your breathing patterns and maintain machine efficiency. Swap out tubing every 6-12 months to avoid cracks, and replace cushions every 9-12 months to address wear and tear.
For travel, pack essentials such as a travel CPAP machine like the ResMed AirMini, bring extra supplies, use dust covers, and ensure everything is stored dry to maintain hygiene. These preventative measures at home, combined with gradual exposure, will ensure sustained comfort and the long-term success of your APAP therapy.
Using APAP for Troubleshooting
It is important to focus on the essentials: regularly perform APAP self-check steps to identify mask leaks, airflow, or pressure issues. Utilize the APAP device troubleshooting guide to address problems like APAP therapy troubleshooting or setup errors. Ensure filters, tubing, and cushions are replaced according to schedule to maintain performance and comfort.
Utilize built-in diagnostics, apps, and occasional resets to address setup errors or software issues. Adjust humidity and temperature settings to avoid rainout and dryness.
Maintain consistency with nightly use, reach out to clinicians or peers for support to ensure adherence, and address persistent problems promptly to safeguard therapy benefits and promote better sleep health.
 Collections
 Topics
 Related Articles