CPAP Mold Concerns: Best Practices for Hygiene and Safety
While there is currently no cure for obstructive sleep apnea (OSA), there are many ways in which you can effectively treat the associated symptoms. The most common involves the use of a CPAP (continuous positive airway pressure) device during sleep.
Many individuals will experience a significant amount of relief and yet, it is important to remember that this type of apparatus will require maintenance from time to time.
One issue which you might experience involves the accumulation of mold. Let’s examine why mold forms, the warning signs to watch for, and how to keep your CPAP device clean.
Why Does Mold and Mildew Develop?
Why are CPAP and PAP devices prone to develop mold? One feature which many devices offer as an option is a built-in heated humidifier. Pressurized air that contains moisture will often help to further alleviate the symptoms of your sleep apnea, while helping to avoid certain conditions such as a dry nose and throat.
However, we need to remember that moist air is an ideal environment for bacteria and mold to replicate. This is the very same reason why homes that are humid will often have a musty smell.
Another common cause can be attributed to a lack of regular maintenance. Any manufacturer will make it clear that machines need to be cleaned and disinfected on a regular basis. Not only will this eliminate any organic matter that may be present, but it helps to ensure that the CPAP continues to function at optimal levels.
Is CPAP Mold Dangerous?
There can also be times when the presence of mold exacerbates specific respiratory issues that may already be present. Some examples include:
- Chronic obstructive pulmonary disease (COPD)
- Bronchitis
- Asthma
- Sinus infections (particularly if there is black mold)
Ironically enough, these are some of the very same conditions that may worsen the symptoms of obstructive sleep apnea. It is therefore clear that an ounce of prevention will certainly go a long way.
How Can You Tell if Mold is Present?
The most common sign that mold has begun to accumulate within your machine involves a foul, stale or musty odor. This is even more relevant if the unit is outfitted with a humidifier and the water has recently been changed. There are nonetheless some additional warning signs that a bit of maintenance is in order.
You might instead begin to develop a sore throat — or the skin around your mask could become slightly irritated. Respiratory symptoms such as coughing or wheezing might also be signs that mold has begun to develop. Either way, it is always better to be safe than sorry in any of these scenarios.
How to Effectively Clean Your CPAP Machine
It is first important to mention that you should always follow the cleaning instructions provided by the manufacturer. If you have additional questions, be sure to contact a customer service representative. You might inadvertently cause damage to sensitive parts that may need to be replaced.
Still, certain guidelines will need to be followed and these begin with a handful of basic sanitary products such as:
- Mild soap or detergent that contain no harsh chemicals.
- Diluted white vinegar (for the humidifier tank).
- Warm (preferably distilled) water.
- A soft towel or terry cloth.
You can then begin to disassemble the machine. Make certain that it is not connected to any power source and once again, refer to the manufacturer’s instructions to determine the exact steps involved.
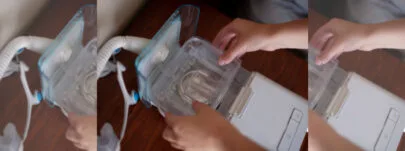
Secondly, remove the hose and face mask. The majority of masks can be further separated into three different sections (the cushion, the frame and the headgear). If your PAP device contains a humidifier, the tank should also be taken out and emptied before moving on.
Most experts recommend cleaning all of the components outlined above by hand. This will enable you to pay attention to specific portions that may require more attention including the headgear, as oils from your skin will often be present and these should likewise be eliminated.
Note that when dealing with electrical systems (such as a heated hose), be sure to follow the official instructions to ensure that no damage is caused.
The final step involves cleaning the tank used to provide water to the built-in humidifier. The best way to tackle this task is to mix equal parts of warm water and white vinegar. Fill the tank and allow this solution to sit for approximately 30 minutes.
Drying and Reassembly
It is always best to allow individual components to air dry. Still, make certain that they are all thoroughly rinsed and free from any soap (even small bubbles or deposits can impact the functionality of your CPAP). It could also be wise to hang the hose assembly so that any excess water is allowed to drain from the interior tubing.
You can then reassemble the machine. As always, it is a good idea to have the instructions nearby so that no steps are missed and the components fit in place as they should. Power up the PAP in order to ensure that it activates properly.
Eliminating CPAP Mold at the Source
While mold is often an overlooked factor, there is little doubt that its presence can negatively impact the symptoms of your sleep apnea. The good news is that the cleaning process is straightforward and little technical experience is required. Consult with the manufacturer or a sleep specialist in order to learn more.
Sources:
https://www.sleepfoundation.org/cpap/how-to-clean-a-cpap-machine


